You are now entering RGB, a bava.studio production!
This post is long and full of images and text narrating the development of bava.studio over the last six months or so. It's A LOT, so a quick tour in the video below might work for all you TV babies out there that just don't have the attention span for an actual full blown post :)
Video walk-through for the TV babies
I haven't really posted a substantive update on the bava.studio since last December, which was soon after I secured the space. Most of the winter and early spring were lost to the old disturbance, so it wasn't until late spring and summer before things started moving. There were a few phases of moving stuff over and building out various elements, so it might be helpful to narrate with some images and a bit of context to bring the progress of the space up-to-date.
"Coming Soon! RGB"
But before that, it might also be useful (at least to me!) to explain the name for the overall space: RGB. While preparing for construction I covered the windows with construction paper and added the message "Coming Soon RGB" on a whim, but it has since grown on me. It's short, simple and the acronym's projection to Red Green Blue, the primary colours in the composite layering used by the CRT monitors in the 80s cabinets and tube TVs, captures the spirit of the space beautifully. As a name it highlights the archaic media inside, and will also make the neon sign outside very easy to color code :) And even if it doesn't translate to Italian all that well, it's still three easily identifiable letters.
State of the space in Mid-December
After getting settled in with first eight games in December there wasn't much action until April when I setup the large green table (pictured above) as a temporary desk for my Windows 98 explorations.
Some Windows 98 computing during the winter of my discontent
In mid-April I brought another 10 games to the space from my basement:
Games in basement lined up to be moved to bava.studio
Games out of the basement and into the foyer on their way to bava.studio
By the end of April I started moving the games around the space and imagining possible designs.
Now begins the process of imagining the space
There was a lot of input from Tess, Miles, Antonella, and my friend Andrea, and this was the time period I was endlessly mapping and re-mapping what possible layouts could look like---both the hardest and funnest part of this process. Below is the space with no walls; it's fairly narrow but goes pretty deep.
A look at the depth of the space, which is relatively narrow
The back of the space
I tried moving the small couch/TV area around in various spots:
Make-shift couch and TV area during the imagining stage
Different angle on the make-shift living room space
But the following minimalistic sketch from late April was pretty close to what the final plan would ultimately be---it even features the secret door! One difference is the wall separating the arcade from the video store is straight, not angled like in the drawing. Additionally, where the couch is drawn in the lower-left there are, instead, two video games.
Early sketch of space
The early sketch of the space was then translated into this by Domus:
he more official sketch of the space above is close, but the couch and chairs would be reversed and the nook would have two video games.
Work started in late May and that's when we started covering up the windows with paper.
Papering the windows as work begins
The team at the design studio Domus started with building out the exposition space in front of the window, or what I've referred to in this blog already as bav-o-rama.
Starting to collect the platform pieces for the table-like structure that will reach to the window, but also have storage beneath.
Work begins!
Here is an almost finished version of the diorama, only things missing in the image below are the sides, back, and top that enclose the platform to be a veritable stage.
the bav-o-rama in all it's splendor
After the diorama was finished, it was then time to build an angled, wood-paneled wall around it to hide it from view.
Two of three side of the diorama enclosure
A look inside the paneled wall alcove:
Inside the diorama enclosure
The paneled wall is in the spirit of my basement from the 1970s, and includes a hidden door that leads into the diorama space so you can access that area cleanly.
Enclosure complete and paneling being added
After the enclosure was finished, the wall dividing the video store from the arcade was built using the same wood paneling design---a testament to how awesome the original came out.
The dividing wall between the video store and the arcade, a discerning eye can make out the secret door
The dividing wall is straight across, rather than angled as originally imagined in my first drawings. That said, it did retain the secret door leading to the arcade, which you can make-out on the left-side of the wall if you look closely at the image above.
The diorama enclosure ready to be stained
Once all the walls were up and I returned from an August lost to work travel and some vacation, I spent almost a week of September staining the panelling to give the space a warmer feeling.
Stained diorama enclosure
Partially stained wall that divides the space between video store and arcade
These images also document that the video shelves for the entertainment wall were installed at about the same time I was staining. As a result, I was under pressure to finish the staining job because the shelves had arrived and were ready to be installed. As you can see in the image below, the blue video shelves go right up against the front wall.
The video nd DVD shelves installed
I also stained the dividing wall, and in the image below you can see the hidden door cracked open just a tad.
The stained dividing wall
We are at about mid-September by this point, and things really started to come together quickly. The shelf intentionally has an open space in the center for two blue pieces of steel, rolling furniture that hold the 27" Sony Trinitron and the 27" JVC tube TVs.
he Blue USM furniture re-purposed from Tommy's room to hold the TVs.
The arcade side of the central dividing wall was also stained, and I have to admit I got pretty high off the fumes.
You can see the shelves coming together in the video store through the secret door.
A closer look into the video store space
After the shelves were installed, Alberto helped me re-combine a bunch of our existing USM furniture to create a kind of greeting stand-up desk. I have a higher chair that I can sit on to work, but I am not sure it is high enough.
Desk being re-configured to act as a work space and stand-up greeting counter
I love the way the USM furniture could be so easily re-purposed for the new office, and also how seamlessly the blue USM TV stands fit into the shelving. The two pieces of furniture are made by two different companies, yet they match perfectly. You can get a pretty good sense of how well they work together in the image below:
The shelves partially filled
Now that the desk and shelves were installed, the idea of covering the paneled wall behind the desk with a wallpaper of laserdiscs and vinyl was yet another ask I made of Domus, and I have to say this one came out amazingly:
A look at the dividing wall with secret door and vinyl and laserdisc wallpaper
Here you can see how well the entrance to the arcade is hidden when the door is closed.
What door?
What's awesome about this design is the both laserdiscs and vinyl slip seamlessly in and out of the slats within the wooded railings. As a result, it is not only a pretty cool design highlighting film and music art, but also a very practical and easily accessible storage solution for over 90+ titles.
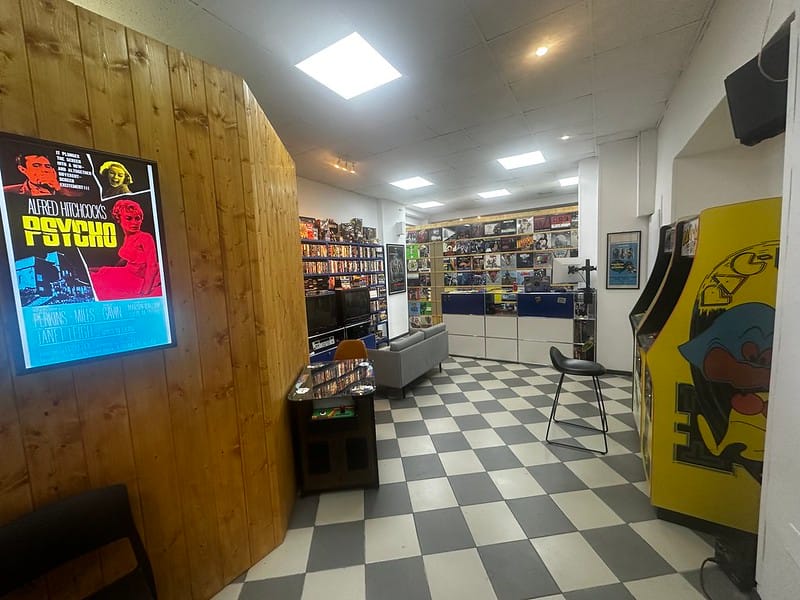
The front video store space is really coming together
That brings us pretty well up-to-date with the progress thus far. The lighting in the video store/diorama space still needs to be re-worked. As of now it is pretty obnoxious fluorescents, but Riccardo of Domus found some cool LED lights that outline the perimeter of those ugly ceiling tiles and actually make the light warmer and almost salvages an otherwise horrific ceiling.
A way to reclaim the horrible ceiling tile with fluorescent lights
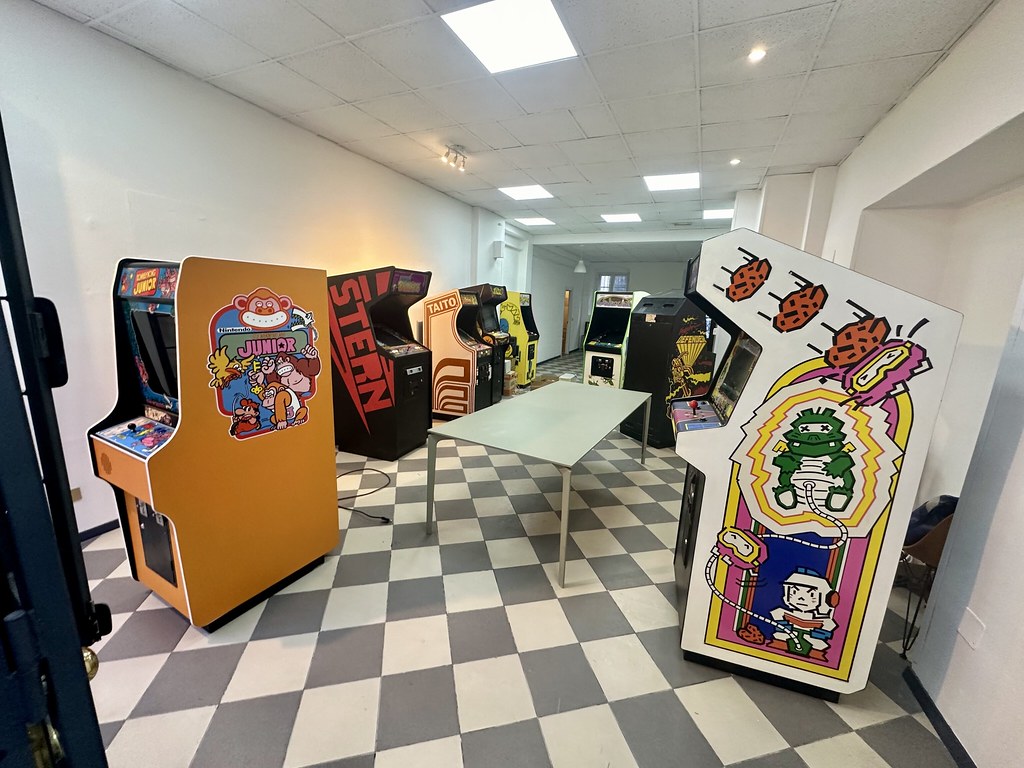
With the video store all but done, I have to turn my attention to finishing the speak easy arcade portion of the space as well as getting that Creepshow diorama finished, but those topics are perfect fodder for subsequent bava.studio posts.